Home
Don't have an account? Create one now! It's always free!


Forgot Password
Ed's Auto Parts - Mention MOTORGEN for a Discount!
Motorgen Sponsor: McLeod Racing
Motorgen Sponsor: American Muscle - Add style and performance to your Stang
Motorgen Sponsor: Hall Fabrication & Racing
Motorgen Sponsor: Injectors Plus - Performance Fuel Delivery Systems
Reply
 
Thread Tools
Old 08-25-2010, 08:30 PM   #1
94cobra69ss39694cobra69ss396 is offline
Fast & Filthy
 
94cobra69ss396's Avatar
 
Join Date: Jun 2008
Posts: 3,840
Default Welding

Thanks to Adam I've been practicing. Well I've practiced twice. I posted up my last weld on another site I'm on and got some great suggestions on bettering my welds. Here are a couple from tonight.


  Reply With Quote
Old 08-25-2010, 08:47 PM   #2
VettezukiVettezuki is offline
I, Vettezuki
 
Vettezuki's Avatar
 
Join Date: Feb 2006
Posts: 14,754
Default

Quote:
Originally Posted by 94cobra69ss396 View Post
Thanks to Adam I've been practicing. Well I've practiced twice. I posted up my last weld on another site I'm on and got some great suggestions on bettering my welds. Here are a couple from tonight.


Now that's start'n to look mighty pro!
__________________
Motorgen on
To view links or images in signatures your post count must be 10 or greater. You currently have 0 posts.

Motorgen on
To view links or images in signatures your post count must be 10 or greater. You currently have 0 posts.

Motorgen Project Car
To view links or images in signatures your post count must be 10 or greater. You currently have 0 posts.
(active)
Motorgen Project Car
To view links or images in signatures your post count must be 10 or greater. You currently have 0 posts.
(back burner)
  Reply With Quote
Old 08-25-2010, 09:24 PM   #3
94cobra69ss39694cobra69ss396 is offline
Fast & Filthy
 
94cobra69ss396's Avatar
 
Join Date: Jun 2008
Posts: 3,840
Default

Thanks. I'm going to keep practicing on tip angle and my movement but at least I have the correct heat and wirespeed for .120 now.
  Reply With Quote
Old 08-25-2010, 11:24 PM   #4
enkeivetteenkeivette is offline
Super Moderator
 
enkeivette's Avatar
 
Join Date: Dec 2007
Posts: 6,850
Default

That does look pro, share the tips! What angle are you holding the tip at? Also, where do you think I can buy square metal tubing? I want to make a hitch.
__________________
I <3 forced induction.
  Reply With Quote
Old 08-25-2010, 11:29 PM   #5
enkeivetteenkeivette is offline
Super Moderator
 
enkeivette's Avatar
 
Join Date: Dec 2007
Posts: 6,850
Default

Also, is there some sort of chart for wirespeed/ relating to metal thickness?
__________________
I <3 forced induction.
  Reply With Quote
Old 08-26-2010, 12:33 AM   #6
VettezukiVettezuki is offline
I, Vettezuki
 
Vettezuki's Avatar
 
Join Date: Feb 2006
Posts: 14,754
Default

Quote:
Originally Posted by enkeivette View Post
Also, is there some sort of chart for wirespeed/ relating to metal thickness?
Should be on your welder. Flip the door open.
__________________
Motorgen on
To view links or images in signatures your post count must be 10 or greater. You currently have 0 posts.

Motorgen on
To view links or images in signatures your post count must be 10 or greater. You currently have 0 posts.

Motorgen Project Car
To view links or images in signatures your post count must be 10 or greater. You currently have 0 posts.
(active)
Motorgen Project Car
To view links or images in signatures your post count must be 10 or greater. You currently have 0 posts.
(back burner)
  Reply With Quote
Old 08-26-2010, 07:11 AM   #7
94cobra69ss39694cobra69ss396 is offline
Fast & Filthy
 
94cobra69ss396's Avatar
 
Join Date: Jun 2008
Posts: 3,840
Default

Quote:
Originally Posted by enkeivette View Post
That does look pro, share the tips! What angle are you holding the tip at? Also, where do you think I can buy square metal tubing? I want to make a hitch.
Here was the best from what everyone posted.

kylesgorter - "I always set the voltage to the recomended setting for the thickness. With 0.023 I got a tad higher and with 0.035 the same or a tad lower. I go high on the WFS settings then start drawing a bead while turning the wfs down very slowly until i get the proper sound. Tuning by sound has always been the best for me. You want it to be a steady buzzing without popping, burnback, or sticking in the pool. You know you have it setup when it sounds like sizzling bacon and theres much less sparks and spatter. Rule of thumb, set the voltage first and tune the wfs to that. Every joint has its own setting that work best for it so experiment with different settings and joints and wire sizes and find what works best, also pushing or pulling the bead has a large affect on bead appearance, penetration etc. Be mindful of the feed angle as well as you do not want to compromise gas sheilding or flow and you want the heat directed into the joint. Always remeber dont keep up with the welder, set up the machine properly so that it keeps up with you.

Dont mess with weave patterns or "circles" or anything. getting your speed control and puddle control down first is most important. Draw straight stinger beads and watch the puddle. once you have mastered your speed control and can control the puddle's shape and thickness you can move on to a whip or zig zag technique. Ive found those to be all thats needed for 95% of joints.

I will say that the quality and appearance of your welding will always depend first and foremost on the joint prep and quality of the fit-up. Proper spacing, tacking, beveling etc is required to get the rest of it right. Some joints need more beveling where as others like corner joints with slightly thicker plate are better without any beveling on the outer shoulder but benefit from beveling in the root of the joint before fitup. Knowing these things is very important and you will not get better without practice.

I like running a smaller wire 0.023 for a lot for the work I do with a higher voltage. I use er70s-6 wire which is pretty standard but some shops supply others so its good to know the differences. You want the edges of your weld to "wet out" so that they look to be burned into the base material while at the same time having no real shoulder or undercut. The quality of your weld and its appearance come a lot from getting tha edge to look right. ive found if Im doing weverything right and the edges and machine are correct everything else is in spec as well."

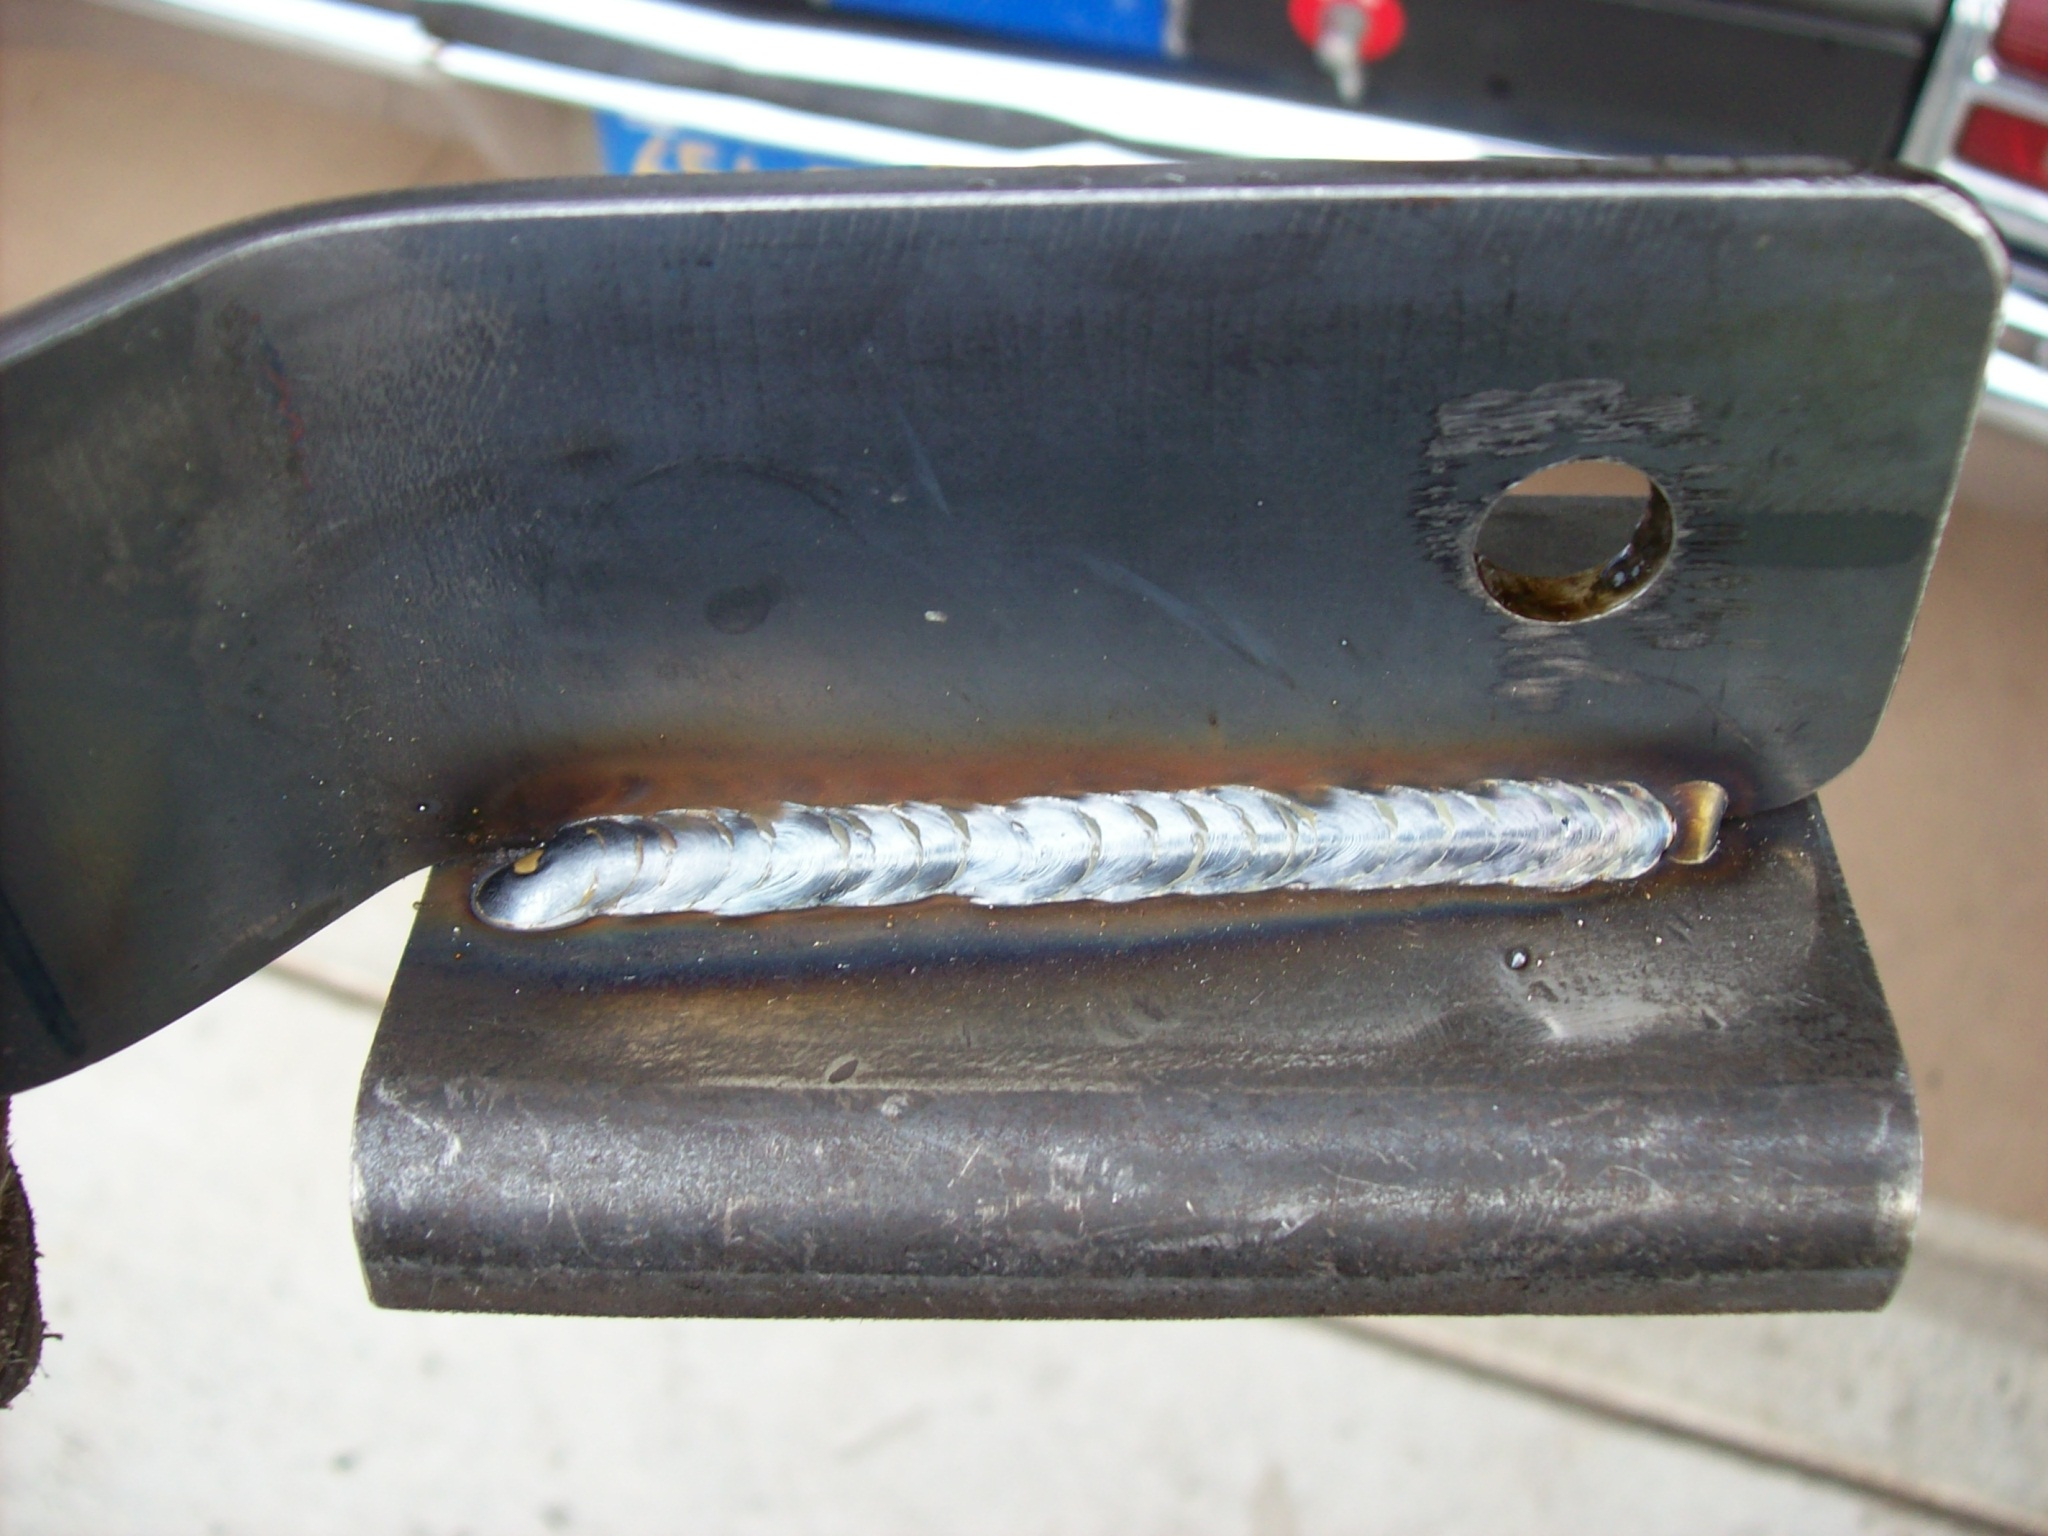
As for tip angle, I had it pointed straight at the joint. This is what I still want to practice with. The other guys say that I can improve my start and finish by changing the angle some.

Also, I usually get my metal from Patton's but it's out in San Bernardino. I don't know where you would want to get it from. Usually these places have a scrap bin and you can get the scrap for cheaper. That's how I got the square tubing that I used on the Explorer.
  Reply With Quote
Old 08-26-2010, 06:12 PM   #8
enkeivetteenkeivette is offline
Super Moderator
 
enkeivette's Avatar
 
Join Date: Dec 2007
Posts: 6,850
Default

What welding forum do you post on? I'm going to chop the area that the ball joint mounts to off the end of my friend's Ranger control arm, weld in a 2 or 3" section of pipe to move the ball joint mount down to fix the angle of the arm.

(Right now it's lifted so much, the control arm is at an extreme angle and it actually rests on the frame.)

Would you recommend that I fill in the gap between the end of the arm and the pipe extension and then do a roll of dimes on top? Or just roll of dimes it over the gap?
__________________
I <3 forced induction.
  Reply With Quote
Old 08-26-2010, 08:13 PM   #9
94cobra69ss39694cobra69ss396 is offline
Fast & Filthy
 
94cobra69ss396's Avatar
 
Join Date: Jun 2008
Posts: 3,840
Default

Quote:
Originally Posted by enkeivette View Post
What welding forum do you post on? I'm going to chop the area that the ball joint mounts to off the end of my friend's Ranger control arm, weld in a 2 or 3" section of pipe to move the ball joint mount down to fix the angle of the arm.

(Right now it's lifted so much, the control arm is at an extreme angle and it actually rests on the frame.)

Would you recommend that I fill in the gap between the end of the arm and the pipe extension and then do a roll of dimes on top? Or just roll of dimes it over the gap?
Dezertrangers.com in the Fab section.

Can you get a picture of what you are trying to fix? The way I have this pictured in my head is that you plan to cut and lower the upper A arm. Is that what you mean?
  Reply With Quote
Old 08-26-2010, 09:06 PM   #10
enkeivetteenkeivette is offline
Super Moderator
 
enkeivette's Avatar
 
Join Date: Dec 2007
Posts: 6,850
Default

Yeah, the arms prob look the same on your Exploder. Since the ball joints are pressed in and we can't screw with them, I plan to cut the end of the arm off, place a pipe on top of the ball joint, weld it to the arm, weld the arm to the top of the pipe.

No pics, haven't done it yet. I'll see if I can get a paint illustration.
__________________
I <3 forced induction.
  Reply With Quote
Reply


Posting Rules
You may not post new threads
You may not post replies
You may not post attachments
You may not edit your posts

vB code is On
Smilies are On
[IMG] code is On
HTML code is Off


All times are GMT -7. The time now is 12:45 PM.